RUOMEI / BUYER’S GUIDE
Custom Neon with Mirror Details: Choose the Reflective Parts Before Sampling
If a reference sign has mirror details, mark the exact parts you want to reflect: small lettering, a logo shape or the surrounding panel. “Mirror neon” alone leaves the factory to guess. Clear backing, a dark panel and reflective details can play different roles in the same design.
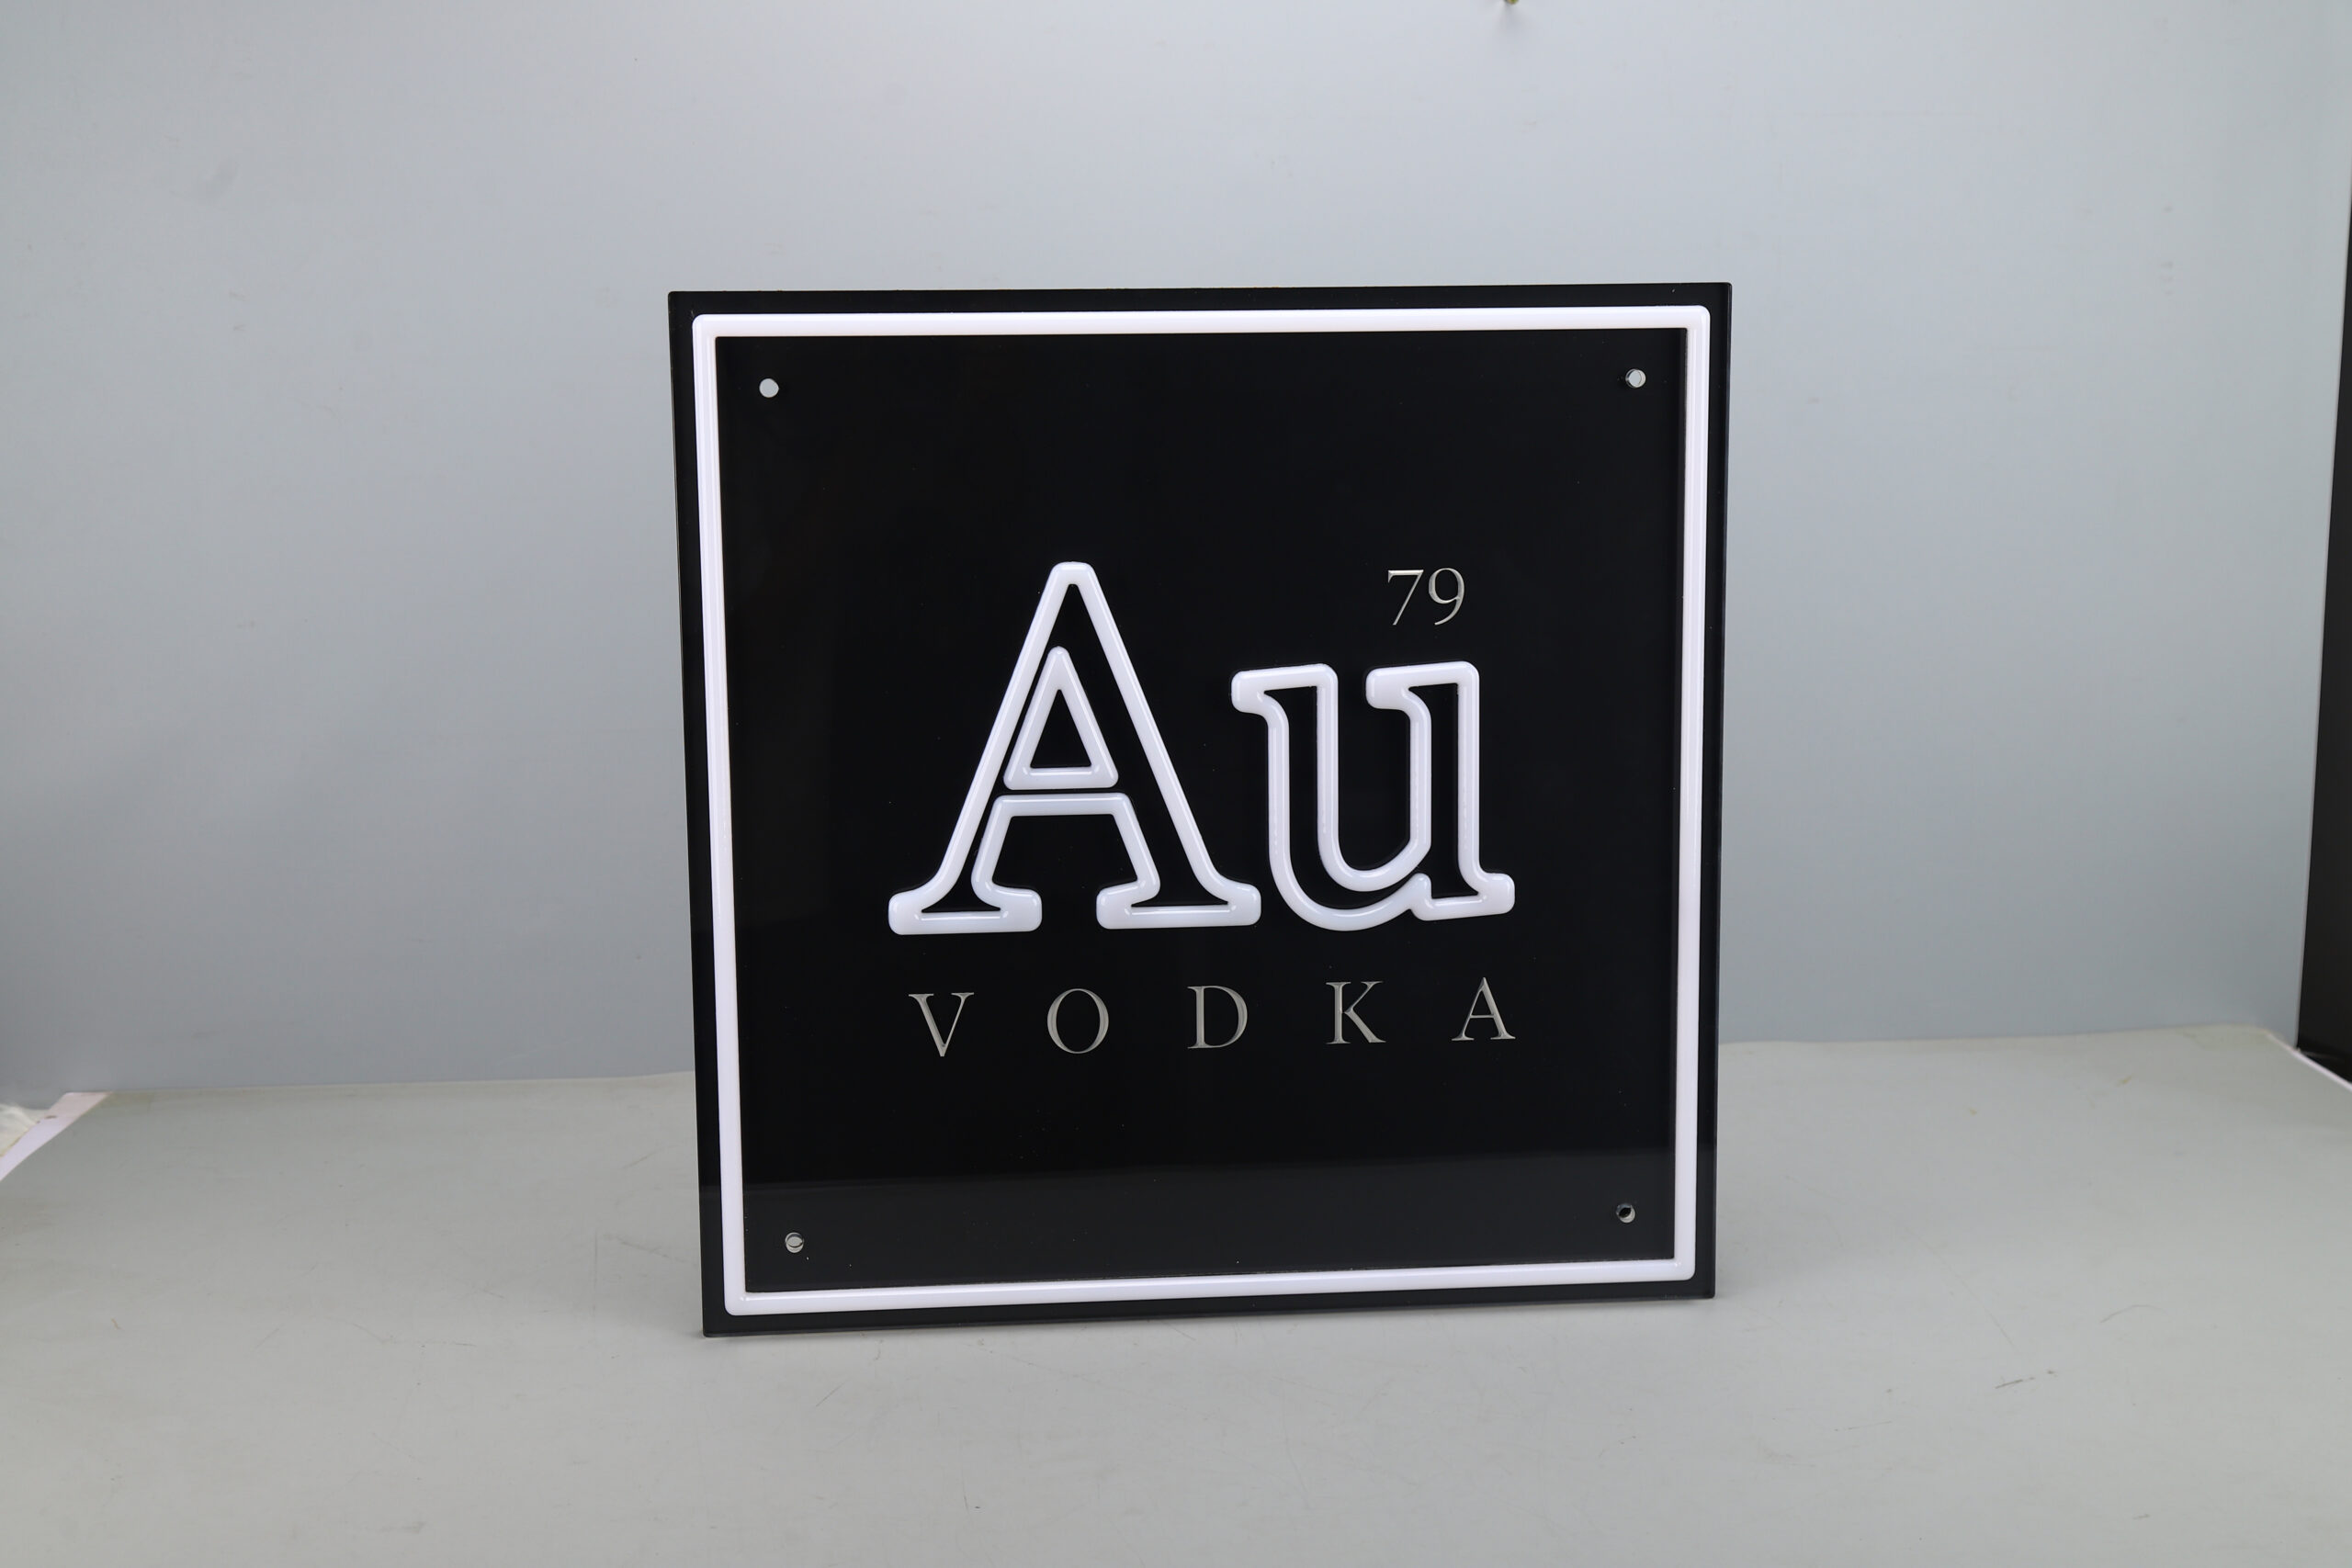
Real product example: the small lettering has a reflective appearance against a dark panel. This does not show a full mirrored backboard, and the photograph does not establish the material grade or finish specification.
1. Name the surface you want to change
On a copy of the artwork, label three things separately: the illuminated lines, the visible panel or backing, and any reflective graphic details. Circle the part of the reference photograph that you like. Keep the original logo as a separate file.
RUOMEI can review neon designs combined with mirror effects by project. The proposed construction still needs to be agreed. A reflective letter does not mean the whole backing is mirrored; a clear backing does not determine the material of the illuminated line.

Separate clear-backboard product example. The background remains visible through open areas. The two photos show different designs, not a controlled comparison of brightness, cost or durability.
2. Decide what should appear around the logo
| Requested treatment | What to specify | What to review |
|---|---|---|
| Reflective lettering or detail | The exact shapes and finish reference. | How the detail reads beside the lit lines. |
| Reflective panel area | The intended area and visible outline, for feasibility review. | What surroundings appear in that area from the viewing position. |
| Clear backing | The outline and areas intended to remain transparent. | The wall or display visible behind it, plus visible supports. |
These are parts of a design brief, not mutually exclusive product categories. If you want clear areas and reflective details together, mark both rather than asking for a generic finish name.
3. Review the appearance with the neon off and on
Ask to see the proposed sample without illumination as well as with the neon on. This helps you separate the visible surface finish from the light effect. Check the smaller reflective details at the viewing distance your customer expects.
A photograph taken in a dark room may show the glow clearly while telling you little about the panel in normal room light. A bright-room photo answers a different question. Agree the sample-review setting rather than approving every surface from a single dramatic image.
4. Send the wall and viewing position
Include a site photograph showing nearby lights, windows and the intended viewing direction. A reflective surface responds to its surroundings, so a supplier’s studio photo cannot predict exactly what your installation will show.
For a clear backing, show the wall colour or display behind the sign. For reflective areas, identify any part of the surrounding scene that would distract from the logo. Review the proposed sample at the intended position where practical; do not assume the same appearance at every store.
5. Put the finish into the approved specification
Ask the proposal to identify the reflective parts, backing outline, illuminated line material, mounting and cable arrangement. If a finish reference is used, record which reference was approved and which parts it applies to. Finish approval does not replace the structure review.
We cannot rank mirror effects and clear backing by price, brightness or durability from their names. Compare the complete proposed designs at the same size and quantity. Care requirements and any environmental limitations should be confirmed for the selected construction.
6. Send a marked reference with your quote request
Start with vector artwork where available, the size and quantity. Add a marked reference image, a site photo and a short note on the desired reflective and transparent areas. If the effect is not final, tell us which parts of the logo must remain unchanged.
Review our custom neon construction options, then use the form below to request a proposal. Ask for the chosen surfaces and their relationship to the lit lines to be shown before sample approval.
FROM YOUR BRIEF TO THE NEXT STEP
Send us what you have so far.
A logo or reference photo, size and quantity will get us started. Include any questions about the design or installation.
Tell us about your project
Use the message field to describe your artwork and requirements.